








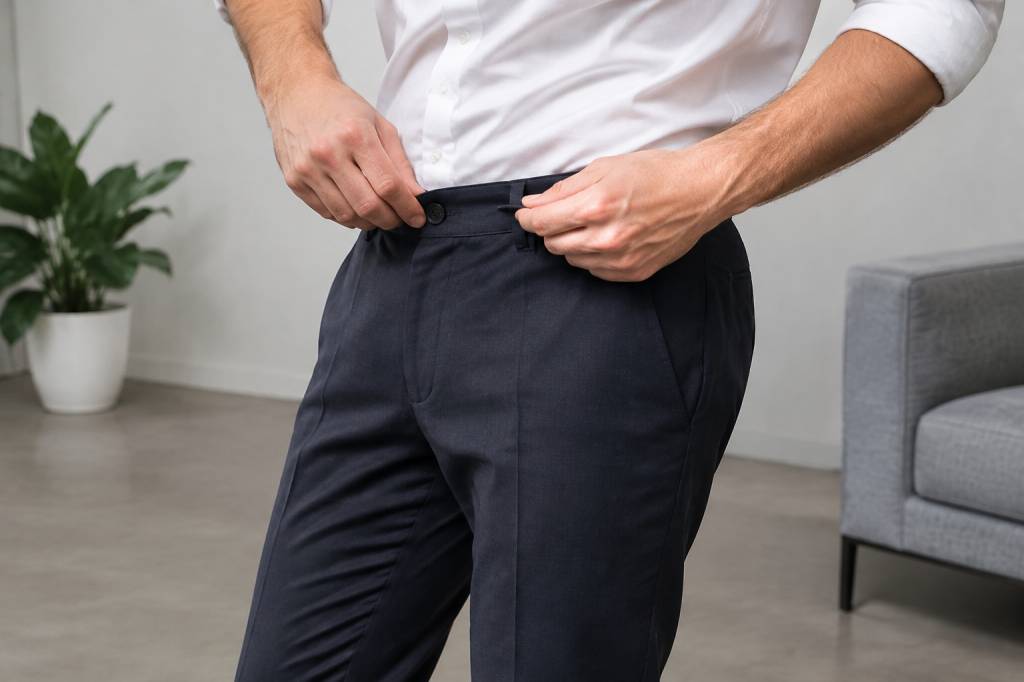
A clean waistband has a quiet kind of confidence. It lets your shirt fall smoothly, gives a tailored jacket an uninterrupted line, and keeps the eye moving instead of stopping at a row of little fabric loops. But before you reach for the scissors, take a breath. Removing belt loops is simple when you know what you’re doing—and surprisingly easy to regret when you don’t.
Whether you’re aiming for a sharper, belt-free outfit or adapting trousers for suspenders, this guide will help you decide if the loops should go, remove them neatly, and finish the waistband so it looks intentional rather than interrupted. Think of it as a small tailoring project with a very visible payoff.
Why remove belt loops?
Belt loops are practical, familiar, and sometimes exactly what a pair of trousers needs. Yet they can feel unnecessary when you never wear a belt. A loop-free waistband looks cleaner with a tucked-in shirt, and it avoids the little bumps that can show beneath a slim knit or a fitted jacket.
There’s also a styling reason. A continuous waistband can make an outfit look more considered, especially with dress trousers worn with suspenders or side adjusters. Fewer visual interruptions can create a longer, smoother line from shirt to shoes. No, removing loops won’t add inches to your height—but a well-proportioned outfit can help you look more streamlined. In menswear, small details often do the heavy lifting.
I learned this after wearing a pair of dark trousers with a crisp white shirt and no belt. The loops stood out like five tiny reminders that something was missing. A tailor removed them, pressed the waistband, and suddenly the trousers looked designed for the outfit rather than borrowed from another one. The transformation was subtle, which is usually the best kind.
Should you remove them or leave them?
First, consider how you wear the trousers. If you regularly use a belt, the loops are doing their job. If the waistband needs a belt to stay up, removing the loops won’t solve the fit problem; it will only remove your easiest adjustment.
Loop removal makes the most sense when the trousers fit securely on their own, or when you plan to wear them with suspenders or built-in side adjusters. It can also work for a particular outfit—say, trousers you want to wear beneath a close-fitting waistcoat. But think about versatility before making a permanent change. Fashion has a habit of bringing yesterday’s solution back around just when you’ve cut off the useful bits.
Check the garment label and construction, too. On inexpensive trousers, the waistband may be simple to alter. On a carefully tailored pair, the loops may be attached through several layers of fabric, and removing them can leave visible marks or disturb the waistband structure. If the trousers are valuable, vintage, or sentimental, let a professional handle the job.
What you’ll need
For a basic removal, gather the right tools before you begin. Good light and patience matter just as much as sharp scissors. Rushing is how a tidy repair turns into a small fabric tragedy.
-
A seam ripper with a sharp, undamaged point
-
Small, sharp sewing scissors
-
Tweezers for lifting loose threads
-
Matching thread and a fine hand-sewing needle, if the attachment points need closing
-
An iron and pressing cloth, if the fabric can be safely pressed
-
A clean, flat surface and good lighting
A seam ripper is usually safer than cutting directly across a loop. Its narrow point lets you undo the stitches holding the loop in place without slicing into the trousers. If you don’t own one, borrow one or buy one before starting. It costs less than replacing a pair of trousers damaged by an overconfident pair of scissors.
Inspect the waistband first
Turn the trousers inside out and examine how each loop is attached. Most are secured at the top and bottom with short rows of dense stitching, sometimes called bar tacks. These reinforced stitches are strong because belt loops are expected to handle pulling and friction.
Notice whether the loop is sewn only to the outer waistband or stitched through the waistband and lining. Look for any signs of wear, loose threads, or previous alterations. If a loop is attached beneath a waistband seam, removing it may expose a larger opening than expected. That doesn’t automatically rule out the project, but it means the finishing will take more care.
Take a quick photograph before you start. It gives you a reference for the original construction and can be useful if you decide to ask a tailor to finish the job. Also check the fabric in daylight. Dark trousers can hide tiny holes indoors and reveal them dramatically outdoors, usually at the least convenient moment.
How to remove belt loops by hand
Work on one loop at a time. Start at the top attachment and gently slide the seam ripper beneath one or two stitches. Cut the thread, not the fabric. Continue slowly across the row, lifting the loop slightly as the stitches loosen. Then repeat at the bottom attachment.
Once the stitching is free, remove the loop and use tweezers to pick away any remaining thread fragments. Avoid pulling hard on a loose thread; it may run into the fabric or tighten a nearby stitch. If a stubborn stitch won’t come away, use the seam ripper again rather than tugging.
Keep the blade pointed away from the waistband and your fingers. A seam ripper is a small tool, but its sharp tip can do real damage. If the fabric begins to snag, stop and check that you’re cutting the thread rather than catching a woven strand.
Repeat the process for each loop you want removed. Some trousers have a center-back loop or extra loops near the sides. Don’t assume every loop has to go. You may prefer to remove the side loops and leave a center-back loop for a particular style of suspenders—or keep one discreetly in place for practical reasons.
What to do about holes and marks
When a loop comes off, you may see tiny holes, compressed fabric, or a darker patch where the loop covered the waistband. This is normal. The finish depends on the fabric, the age of the trousers, and how tightly the stitches were sewn.
For small stitch holes, gently massage the fabric between your fingers or brush it lightly with a clean clothes brush. A careful press with an iron may help the weave settle, but check the care label first and place a pressing cloth between the iron and the trousers. Use the correct temperature; shiny patches are not the elegant detail we’re aiming for.
If holes remain, the waistband may need a few tiny stitches to close the old attachment points. Choose thread that matches the fabric and work from the inside where possible. Secure the opening without pulling the fabric tight or creating a visible dimple. If the color, texture, or construction makes the repair obvious, take the trousers to a tailor. A professional can sometimes reposition the waistband fabric or make a cleaner finish than home sewing allows.
Should you cut the loops instead?
Cutting each loop near the waistband may seem faster, but it usually leaves small fabric tabs behind. Those stumps can fray, curl, or peek out beneath a shirt. They also make it harder to create a smooth finish later. If you want the loops gone, unpick the stitches rather than trimming the fabric.
There is one exception: if you’re removing only a loop from a casual garment and don’t mind a visibly informal result, careful trimming may be acceptable. Even then, leave a little fabric rather than cutting flush against the waistband, and finish the raw edge to prevent fraying. For dress trousers, take the extra time to unpick the attachment properly.
When a tailor is the better choice
Some alterations are satisfying to do yourself. Others are best handed to someone who has spent years persuading stubborn fabric to behave. Choose a tailor if the trousers are expensive, lined, made from delicate material, or constructed with a waistband that would need reshaping after the loops come off.
Professional help is also wise when you want to add side adjusters, convert the trousers for suspenders, or repair visible marks. Ask for a clean loop removal and a finished waistband, and explain how you plan to wear the trousers. A good tailor will consider the garment’s construction, not just remove the stitching and send you on your way.
If you’re unsure, ask for an estimate before authorizing the work. A short conversation can clarify whether removal is straightforward or whether the waistband needs more extensive alteration. It’s a modest investment compared with a pair of trousers you no longer feel comfortable wearing.
How to style trousers without belt loops
Once the waistband is clean, wear the trousers as if the detail was intentional. A tucked-in shirt, a well-fitted jacket, and suspenders or side adjusters can make the look feel polished. If the trousers fit securely, a simple tucked-in shirt may be all you need.
Pay attention to the rise and length. A waistband that sits comfortably at your natural waist can help trousers drape cleanly, while the right hem keeps the line from bunching over your shoes. The goal isn’t to make every outfit look formal; it’s to make each part look as though it belongs there.
For a relaxed look, pair loop-free chinos with a fine-gauge sweater or an open-collar shirt. For dressier occasions, choose a tucked shirt and suspenders that suit the trousers. Suspenders should sit comfortably and hold the trousers at the right height—not pull them upward like a pair of curtains caught in a breeze.
And remember: beltless doesn’t mean unfinished. If the trousers slide down, have the waist adjusted or use side adjusters. A smooth waistband is only stylish when it stays where it’s meant to be.
Common mistakes to avoid
-
Removing loops from trousers that depend on a belt. Fix the fit first, or choose a different way to keep the waistband secure.
-
Using large household scissors. They make it harder to control the cut and easier to damage the waistband.
-
Pulling stitches out by force. Cut each attachment thread carefully to avoid snags and runs.
-
Ignoring the fabric care label. Heat and steam can damage wool blends, synthetics, and delicate finishes.
-
Removing every loop without considering how you’ll wear the trousers. Keep the garment’s purpose in mind before making a permanent change.
-
Expecting old marks to disappear completely. Pressing may help, but worn or sun-faded fabric can retain a visible trace.
A small alteration, a sharper impression
Removing belt loops can give the right pair of trousers a cleaner, more deliberate look. The key is to make the choice for a reason, work slowly, and respect the garment’s construction. Unpick rather than hack, check for marks before pressing, and call a tailor when the fabric or your confidence says, “Perhaps not today.”
Start with an older pair you don’t wear often if you want to practice. Once you’ve seen how the waistband responds, you’ll know whether the same alteration suits your better trousers. A few carefully removed stitches may be all it takes to give an outfit a calmer line—and sometimes that little bit of polish is exactly what makes the whole look click.